Monday, 29 April 2013

Sweet-Poppy Stencils

 
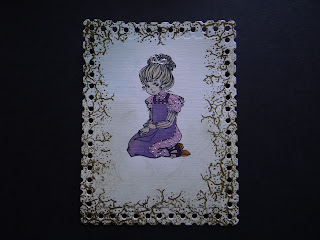
Weeping Willow  Sweet-Poppy Stencil


Hi -I really love this stencil from Sweet-Poppy Stencils!
A quick card today using the clear paste and then dusting with gold Perfect Pearl to give a rich finish. The trick, I find, is to be very patient and leave  to dry over night after dusting and then use a soft tissue to ensure all excess dust is removed from the tree area. Matt and layering to finish.


Saturday, 27 April 2013

Leaf and Raindrops


Stamp from designs by Ryn
 
Found this dried leaf in a book and decided to try out the Water Droplets set from
Stamped with Stazon and highlighted with white opal Liquid Pearls  rangerink.com.
Printed this leaf background paper and mounted the leaf onto it. Matt and layered with brown and white to bring it all together.


Wednesday, 24 April 2013

Sweet-Poppy Stencil Tree

 
Sweet-Poppy Stencil tree
 
 
the second tree in this set reminds me of a dark wintery night with the wind howling  and snow falling! Hopefully I have captured this by lightly spritzing Cosmic shimmer onto the background. Placed stencil on and used the pearlescent paste.Removed stencil carefully and whilst stll wet tapped a little Perfect Pearls from a stencil brush ( patina green). It's amazing the different effects you can get by using a different colour background. Love these quality stencils
sweet-poppy.co.uk           ~~~      rangerink.com

Tuesday, 23 April 2013

Sweet-Poppy Stencils - weeping willow

 
Weeping Willlow Stencil from Sweet-Poppy Stencils


This is my first project using a stencil. I used the pearlescent paste to cover the stencil and after removing the stencil and while the paste was still wet used Perfect Pearls  to add the colours. Used a chunky brush dipped into the powders tapped excess off and then tapped over the paste. As the powder takes the moisture from the paste is develops into a lovely sheen. Probably best to leave 'til completely dry before brushing of any remaining powder.
*********************************************


Thursday, 18 April 2013

Seahorse Stamp

 
Designs's by Ryn - Seahorses and water drops and leafy branch


Love these stamps from Ryn - Spritzed silver cosmic shimmer and did the stamping. Used Promarkers and Perfect Pearls. Highlighted each water droplet with a pearl of white opal Ranger Liquid pearls.
designsbyryn.com                    letraset.com                 rangerink.com


Wednesday, 17 April 2013

Masking and Distress Inks


Tag using Distress Inks


Placed a mask for the background and distressed in the colours and then stamped the butterflies and flowers.Highlighted the tips of the flowers with Liquid Pearls to finish.


Tuesday, 16 April 2013

Ryn's Origami Bunny!

 
This little bunny just needed his carrot!
 
 
 A liitle stamp from designsbyryn.com - Origami Bunny. Distress Inks and Promarkers to colour the background, foliage and Leafy branch. Used Perfect Pearls to colour the Bunny after stamping with Versamark and added a carrot which I did freehand. Created the grass and ground leaves with a stamp from VivaLasVegastamps.  vlvstamps.com
A few yellow PPearls flowers, matt and layering and that's it!


Monday, 15 April 2013

Stamps by Design by Ryn

 
Hummingbird
 
 
Designs by Ryn - used 4 of Ryn's stamps on this card
Hummingbird, Raindrops Pansies and Leaves.
Spritz the paper with cosmic shimmer
 and then stamp onto the card ( Centura Pearl reverse side) and used Promarkers and Perfect Pearls to colour in. Stamped a set of the pansies off the page to colour, cut and decoupage.
Why not pop over to designsbyryn.com to have a look at her stamps.They are beautiful designs and a quality product too.
Have a good week all.
~~~~~~~~~~~~~~~~~~~~~~~~~~~~~~~~~~~~~~

Sunday, 14 April 2013

Project from Eileen's Workshop

 
 How busy we were at Eileen's Workshop on Saturday!
 
This tag was made by first distressing the background and then simply stamped my image with  Stazon.The tips of the flowers were highlighted using Ranger Liquid Pearls. Use a corner stamp as a mask and used a green Stickles glue to fill. Again highlighted using Pearls. Finished tag with twine
*************
Again this second tag was made using the distressing technique. Shaded background and then misted lightly with cosmic shimmer. Stamped my gerbera flower and then added embossing powder and heated. Stamped foliage (Sheena Douglass Stamp). Added twine to finish
 
Why not have a look at the dates of Eileen's Classes. They are great fun!!
Thank you for looking today.


Distress Inks Card

 
Distress Inks Workshop
 
 
Had great fun at Eileens Workshop again!
I used a stamp with a "flat" bottom to sit near the bottom of the card. Dab Distress inks - any colour goes on to your stamp! Spritz lightly with water and stamp to give a water colour effect.You can finish as you like - I just matt and layered,added some twine and a few jewels and that's it.
A really quick and effective card. Hope you like it.

Friday, 12 April 2013

Etched leaf card


Etched leaf
 
Similar to the butterfly card, this etched leaf again used a peel off. I left the peel off on the card, mounted it into an aperture card  and piped some swirls and pearls to finish.
 
 
..\..\..\..\..\..\..\..\..\..\..\..\..\..\..\..

Wednesday, 10 April 2013

Oriental Card


Stamped Card with an Oriental theme
 

Hadn't used these stamps before.Got them from a bargain basket. Stamped background wording ( hope text is the right way up! Apologies if not) Stamped fan off card and used Promarkers and liquid pearls to decorate. The lady and child is a fabric sheet which I cut out and decoupaged. This fabric can be heated to create dimension. Finally added a pearl pearls on the corners.
letraset.comrangerink.com

Tuesday, 9 April 2013

Lavinia Stamps April Challenge Bright and Beautiful

 
 Lavinia Stamps
 
 
Colourful flowers using Lavinia Stamps using assorted colours.Decoupaged  some flowers to give a lift to the card. Used Promarkers this time to create the background and sky.Stamped the relief stamp onto the top and carried it down the sides too.
Thanks for looking today
I am entering this card into the Lavinia April Challenge - Bright and Beautiful


Monday, 8 April 2013

Etched Butterfly

 
Butterfly card
 
 
A bit larger than Twinchies this is an etched card. I used a peel off butterfly and scraped off the surface to get the outline.Then freehand put the markings on. Mounted in a frame card and put a few Pearl drops on the key areas. It's that simple!!

Sunday, 7 April 2013

Lavinia Poppies and Spellbinders

 
Spellbinders and Lavinia Stamps
 

A second quick card I made today using Dew Drop Brilliance ink in a gold.Added further highlights with a fine nib gold pen. Added a Spellbinders flourish and an organza bow coloured with the ink pad to match.Cut the corner out for interest and then stamped an imprint with the ink pad direct onto the mat on each corner.Layered onto white card edged with an orange Promarker.Added a few pearls with my Ranger Liquid Pearls( cantaloupe melon) on the corners and poppy seed blowing in the wind ( silver).


Promarkers and Lavinia Stamps


 Lavinia Stamps and Promarkers


I used a new embossed paper from Papermill Direct for texture and stamped lots of a Poppy stamp from Lavinia Stamps and using Promarkers of shades of red and deep pink highlighted the flowers.Used a little Stickles glitter on the edges of some of the petals. Stamped the tree trunk and filler stamp from Lavinia using Versamark and then went over the trunk in a light brown Promarker and the filler stamp round the page with a  pale green. Filled  inbetween the poppies with a pale green Promarker and freehand built in the clouds, again with a Promarker.
I
 

Saturday, 6 April 2013

Lavinia Stamp, Promarkers

 
Promarkers, Lavinia Stamp and a Stamp from the craft box


A quick card today using a figure stamp which I coloured in using Promarkers. Edged card with a Lavinia stamp ( Texture Stamp) which is really useful for filling a border ( goes well with the Lavinia Tree trunk too) 
 
promarkers.com    ***************    laviniastamps.com

Thursday, 4 April 2013

Twinchies Challenge #4

 
Show us your Twinchie


Had fun with April's Twinchie - didn't realise how many techniques I could use!! So, PanPastelled ( panpastels.com )the background and then masked the peel offs with Pans as well to leave a white area round the petal. Used a tiny leaf corner punch on 3 corners and a Spellbinders spellbinders.com grass die and cut it about (very technical) to fit my 2" x 2" card.  Mounted this onto another card the same size and then filled the leaf gaps with a fabric leaf to add interest. The decoupaged flowers were peel offs stuck onto paper and then "filled with my favourite Ranger Liquid Pearls rangerink.comwith a few more leaves. Oh ~ and then decoupaged a Bee from  laviniastamps.com, coloured him with promarkers promarkers.com and stuck him on a  piece of the loose grass to add dimension.
http://twinchie-twinchiehotmaillive.blogspot.co.uk
I am entering this card into Twinchies April Challenge

Wednesday, 3 April 2013

Butterfly Card


Stamped Butterfly
 
 
The background is a piece of Cor'dination and I sanded lightly to reveal the green background.Cut a flourish and mounted this onto a background paper.Matt and layered a hexagonn after I had stamped the full butterfly and a part of the wing.Decorated with liquid pearls and coloured with Promarkers and made pearls ont the corner wiht Ranger Liquid Pearls.


Monday, 1 April 2013

Ranger liquid pearl on a Stamped butterfly


Stamped Butterfly
 
 
Creative Expression Butterfly stamped onto card and then had a lovely play using my Liquid Pearls.Once dry it will form the feature on a card.
Enjoy your Bank Holiday whatever you choose to do!